Showing posts with label how to. Show all posts

Monday, January 23, 2012

Jacek's Book: Finished!

Day five

... and the last day of work, although the book must still rest in the press for a few days before going away to its new home.


 Title is hand written - in translation, "Byzantine Manuscripts in Collections from Bucharest"

 Detail of the custom handmade brass book-clasps and painted edges

On the front cover, a small detail of a bestiary. Painting is done in egg tempera on golden leaf and varnished.


There are 15 blank page inserts with hand writing or hand painted decorative details on small pieces of handmade paper
 

Tomorrow I'll be back with photos of the book Jacek made for me. It's a gem.
  

Thursday, January 12, 2012

Jacek's Book: Making the Book Clasps

Day Three

I plan to mount three clasps on this book. The main one, made of two pieces, on the fore edge and two smaller ones on the lateral sides. I wanted it like this mainly for the sake of the geometric composition but I also think it's good to have some sort of reinforcement of the cover on the longer sides of the book.

I made these out of 0.6mm (22 gauge) brass sheet that already had some nice patina on it.


First I cut the rough pieces with metal scissors. Then I make the drawing on them with a permanent marker. The decoration is what requires more patience and muscles... I only used a small metal saw and rasps of different size and shapes as I don't have any special electric tools for metalwork (yet...). 


The model is very simple, done by scratching, punching holes and making impressions into the metal (I hammered it using a nail).


Last step is to shape the clasps, pretty simple to do with a pliers for bending jewelry.


Tomorrow, the cover...
  

Wednesday, January 11, 2012

Jacek's Book: Painting the Book Block Edges

Day Two 

Things started to get more interesting... I love painting the book edges and I know that Jacek will also like it. I wanted a simple pattern for the decoration that would fit with the content of the book.

My improvised work-table-press :)


More on how to paint the book block edges here, in a post I made some time ago.


And on to sewing the headbands, made of green and ocher silk thread.
 

Tomorrow... the book clasps!
  

Tuesday, January 10, 2012

Jacek's Book: Sewing the Book Block

Day one

I decided to devote myself entirely to this project until I finish it. There are only a few days left until the 15th so I avoided taking other orders during this time. I'm happy, I have all the time I need to work without rush and make this book one of the best I've made so far :)

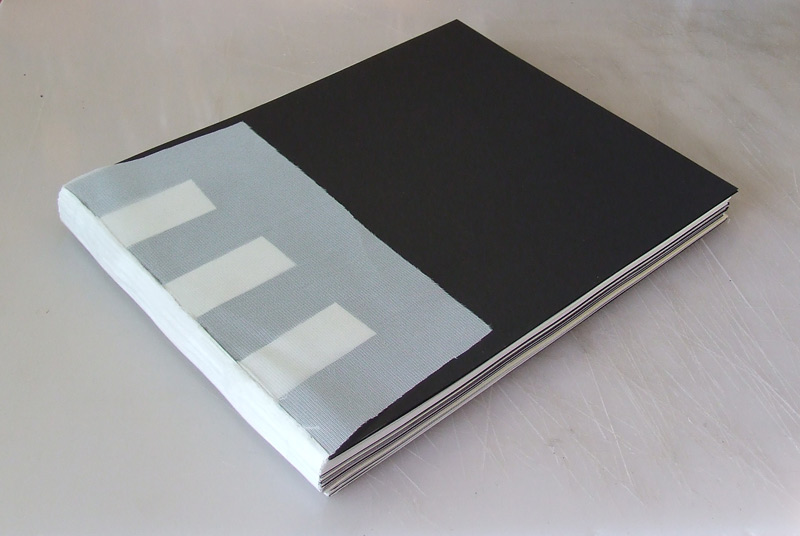
The day started with the removal of the existing binding and sewing the new book block.


As I already mentioned, this is my first project of this kind and I was not aware of some aspects involved in choosing an ideal book for rebinding. This one (as most of the books produced nowadays) is printed on thin glossy paper which does not react well with humidity and tends to get wavy. The adhesive used for the spine was insoluble and I had to remove it mechanically from each signature. Plus, the book is in horizontal format which (for me at least) is harder to handle. So I came with an idea which I think solves more things at the same time. I decided to add some interleaves made of thicker paper between part of the pages. These are made of black and cream Bristol board and by the way, I'm not planning to leave them empty :) This is how I work... when in doubt, just take the creative approach!


The inserts have also helped to increase the thickness of the book block, which was quite thin for the kind of closing system I have in mind.


Once the spine was glued I left the book sleep in the press over night and in the next morning I took it to the small printing house nearby where a very nice man always helps me cut my book blocks with the guillotine.


More to come... tomorrow :)
  

Thursday, March 17, 2011

Paste Papers

As you probably noticed by now, I'm very curious and experimental when it comes to my art. I'm also in permanent danger of getting hooked to new and new hobbies. I have flirted before with the idea of making my own papers to use for book covers and endpages and it was always such a fun. Yesterday I tried making paste papers for the first time. I won't get into details as to how they are made, as there as plenty of tutorials on the internet but briefly, making paste paper is an historic method to decorate paper by applying a paste made of starch / glycerin / methyl cellulose mixed with colors. The possibilities are infinite - the use of different backgrounds to work on, any type of colors such as ink, paints, pigments, various paper textures and tools, basically anything that can create a pattern - combs, stamps, fingers, etc.

Here are the results of my trials from yesterday. I chose a more 'vintage' color pallet as I want to use these with my old leather books. An overview of each paper sheet (around 12 x 19 inches) at the right and a close-up view at the left.


Friday, February 25, 2011

Making Book Clasps

Here's my latest addiction: making my own book clasps! I've been searching for them for ages, craved for those in old books, but never actually tried to make my own until now. Obviously, I have absolutely no experience with metal work and it wasn't that easy until I got the first one right. I only had available some basic tools like scissors and rasps for metal so everything is really handmade :) But I was dreaming of trying this since some time now and meanwhile I kept collecting every bit of metal that I thought might come handy one day. So here are my first trials, made of brass.


Friday, June 18, 2010

Frame Restoration, Part Two

Frame before and after restoration.

As promised I’m back with a few more pics from the restoration of another frame. This one is my favorite, I bought it in a fair about a year ago but I never got around to restoring it until now. The procedure was the same as here, except for the reintegration of the color as this frame is painted black over a layer of metal leaf.

Making the mold for the missing parts using plasticine.

Filling the mold with gypsum; Removing the pieces from the mold; 
Shaping the pieces to fit in the lacunas.

Fitting the pieces onto the frame; 
Filling the fissures created between the added parts.

Detail of the remade ornament; Sealing the surface with shellac.

Cleaning and varnishing the frame.

 Applying color according to the original surface: over the metal leaf (left) and directly on the new surface (right).

 
Frame after restoration.

After finishing the frame I painted this small copy of a byzantine image that represents the Thrones (angels of Third Order). I like very much this representation but mostly I wanted to have a better reason to hang the frame on the wall besides the restoration itself.

And last but not least, the artist at work :)


Wednesday, June 9, 2010

Frame Restoration, Part One


The other day I was bragging with my latest finds among which an antique frame in poor state of preservation. Now I’m back with photos from the restoration treatment. I wasn’t able to find much information on this subject on the net so I thought it would be interesting to share my experience. Not quite a tutorial, but I wanted you to see at least how I did it.

Antique frames are usually dusty and dirty. So the first thing to do is to clean the surface by removing the dust with a dry brush. This is done on both the surface of the plaster decoration and of the lacunas, with care to the parts that may move or detach from the support.
The next step is to consolidate the friable areas of the plaster with a solution of fish glue (or gelatin). The adhesive (a 10% solution will work) is mixed with water and then heated until it dissolves. Ideally this should be done in bain-marie to keep the temperature below 100ºC (212ºF), as boiling will affect the adhesive properties.
The solution is then applied by brushing in the friable areas or injected in the cracks or detachments of the plaster.

The large missing parts of decoration are reconstituted using molds of existing similar parts. I made the molds using modeling clay because it was what I had available, but silicone or a casting resin will work best. Generally the mold should be a bit larger than the missing part so the desired shape can be cut out once the plaster is dry.

Antique frames were made of plaster based on gypsum or chalk and glue but gypsum works best for the reconstitution of the missing parts as it has a shorter setting time. A bit of glue may be added to the gypsum to enhance its resistance and elasticity.
When the gypsum is dry the modeling clay can be removed. The piece can then be shaped to fit into the lacuna of the frame. To attach it into its place use wood glue (PVAc).

For smaller areas that can be remade without using the mold, a filler based on chalk and fish glue (10%) can be applied in layers with a brush until the desired shape is obtained. The same filler can be used for the cracks and lacunas formed at the joins between the original and the reconstructed parts. After drying, the surface of the fillings can be polished by sanding or smoothen with a wet cotton swab. The excess of plaster and other eventual marks should be removed in the same way.

Next step is to retouch the restored parts so they fit the original. This frame has golden metal leaf, so the new parts had to be gilded also. Metal leaf is applied by the help of an adhesive, but before applying it the surface must be sealed so the adhesive does not penetrate into the plaster. I used shellac applied in two layers as a sealant.
After all the restored areas were gilded, I applied a patina made of varnish and pigment. It may be quite difficult to obtain shades very similar to the original in case of metal leaf retouching. To ease the matching of the shades I sometimes use gold or bronze dust in combination with the pigments and varnish.

And voilà the frame after restoration.

Once the restoration practice took over my workshop I decided to work on another two frames at the same time. I’ll post some more photos soon.